Monday, October 3, 2011

Man vs Food- Salmon with Sundried Tomato Dauphinoise


Man vs Food

After three months in our flat, the walls remain bare and the internet unhooked. The only thing I am happy to report is in full force is the kitchen.

Jonathan, our roommate and resident ladies man extraordinaire, is quite the chef. Perhaps this skill was one of the instrumental factors in his ascension in the world of women. I do have to say there is nothing better than a man who can find his way around the kitchen. When he noted he was cooking a weekday meal for the summer camp family (our immediate group of friends), I was excited to see what made the table.

Salmon, dill, and greens; was this boy food? Have we entered the age where men contemplate the calorie count of each serving? This was a far cry from the Hamburger Helper with fried accompaniments my college boyfriend craved but was a refreshing change. Jonathan has now taken on the task dominated by my mother for over twenty years. He gently reminds me of my calorie intake when he sees me eating chocolate and he stresses the importance of exercise. God help him..

J-Man's Salmon with Lite Sundried Tomato Dauphinoise

Serves 4

Baked Salmon with Sliced Onions and Cherry Tomatoes

4 servings of fresh salmon (with or without skin, according to preference)

1 small white onion

16 cherry tomatoes

Juice of one half lemon

Salt and pepper

A tiny bit of olive oil

chopped fresh dill

Instructions

· Pre-heat the oven to 200F

· Pat Salmon dry.

· Wipe the bottom of a baking sheet with olive oil

· Place salmon on the tray, assort thin slices of onion over the fish

· Pour lemon juice over

· Place dill over the fish and cherry tomatoes around

· Sprinkle with salt and pepper (if desired)

· Bake for 15-20 minutes (according to preference).

Sun-dried Potatoes Dauphinoise (with very little cream.. of course)

6 potatoes

1 small knob of butter

1 small jar of sundried tomatoes

3 Tbsp cream

1 Tbsp milk

1 clove of garlic, minced

1 egg

Salt & Pepper

* serve with steamed asparagus

Friday, June 10, 2011

Glazed Toman with Stewed Peppers and Manchego Risotto.


My apologies for my complete lack of contribution this month. I shall explain. I have been a gypsy wandering from house to house for many moons now. While staying at others it is not best practice to take over their kitchens, make a mess, then force feed them.... so I have been eating peanut butter sandwiches and local hawker center food. I am SO ready to get back behind the stove and continue where I left off. Luckily, we are moving into a new flat next week and I will be going on a cooking rampage so FASTEN YOUR SEATBELTS!

Toman also known as the "giant mudfish" is typical in Southeast Asian cooking. Normally found in street stalls barbequed to perfection, you can also buy fillets at the g-store and fancy it up at home. It is meaty flaky and handles glazes and spices well. If you can't find Toman, buy some catfish and give it a Southern twist!

xx

Glazed Toman with Stewed Peppers and Manchego Risotto
serves 2

Ingredients:


  • 2 medium Toman fillets, bones removed

  • 1 tsp soy sauce

  • 1 tsp brown sugar

  • 1 tsp apricot jam

  • 2 cloves of garlic, minced

  • 1 onion, finely diced

  • 1 tsp tomato paste

  • 3 peppers (one green, one yellow, one red), julienne

  • extra virgin olive oil

  • dash of tabasco

  • 4 tablespoons (1/2 stick) butter, divided

  • 1 large onion, chopped

  • 1 1/2 cups arborio rice

  • 1/2 cup dry white wine

  • 5 cups (or more) hot chicken (or vegetable) broth

  • 1/2 cup manchego, shredded

  • salt and pepper
Directions:

For the fish:


  • Preheat the oven to 425F/220C

  • Mix the glaze together.

  • Coat fish.

  • Put the fish in the oven for 15 minutes until flaky and perfectly cooked.

For the peppers:


  • Sweat the garlic in the olive oil over the stove.


  • Add the peppers and cook on medium heat for 5 min.


  • Add the tomato paste and stir.


  • Add a ladel full of the warm chicken stock and let thicken but be careful not to overcook the peppers.


  • Sprinkle on some Tabasco!


For the risotto:


  • Melt half of butter (2 Tbsp) in a heavy saucepan over med. heat.


  • Add onion and soften (about five min).


  • Add rice; stir and toast for a couple of minutes.


  • Add wine and cook until almost all liquid is absorbed. Stir constantly!


  • Add 1 cup hot broth. Simmer until broth is almost absorbed (KEEP STIRRING!!! You don’t want any to stick to the bottom)


  • Add more broth, 1 cup at a time, allowing each addition to be absorbed before adding.. stirring the whole time!


  • You know it’s done when risotto is tender and mixture is creamy.


  • Take off heat and add the manchego and salt & pepper to taste.


  • Serve with the stewed peppers and the fish on top!

Wednesday, May 25, 2011

Banana Bread with Toasted Walnuts and Dark Chocolate

Believe it or not, this recipe comes from a leaflet I found in the Guardian called 'quick and healthy snacks'. To me that says 'eat me'. It's a booklet done by Tomasina Miers, who just so happens to have a very wonderful Mexican restaurant (make that plural) in London and very appetising Mexican cook book. It turns out she is also a dab hand at 'quick and healthy snacks'. Banana bread is very important to me, so I'm not about to share a recipe with you that I think is under par. For the best part of my life I have loathed the banana, except in 'bread' form. As it so happens I now love banana, so the bread form is even more enticing to me. Add some dark chocolate and toasted walnuts and you have a grown up version that lasts for days and certainly fills the elevenses slot without too much guilt. The only change I have made is to add more banana, I tend to use three when Tomasina's recipe calls for only 2 medium bananas, in weight: 250g. It's great for packed lunches as well as tea time. Just don't give it to someone with an allergy to nuts.

Ingredients:


125g softened, unsalted butter

120ml semi-skimmed milk

1 tsp lemon juice

150g walnuts

250g plain flour

1 tsp bicarbonate of soda

1/2 tsp cinnamon

A couple of pinches of ground allspice

200g dark brown soft sugar

2 large eggs, beaten

3 very ripe bananas roughly mashed

A few drops of vanilla essence

150g 70% dark chocolate, roughly chopped

2 small loaf tins*

Preheat the oven to 180C and leave the butter out to soften. Mix the milk with the lemon juice and leave aside (this will curdle, and give it thickness). If you have good non-stick tins then all you need to do is line the bottoms with some parchment paper, keep the parchment in place with some dabs of butter.


Put the walnuts on a baking tray and warm through the oven until they are lightly toasted, about 5-8 mins then leave to cool. Sift the dry ingredients - flour, bicarbonate of soda, cinnamon and allspice - into a bowl. In another, larger, bowl, cream the butter and half the sugar until pale, light and fluffy. I am still of the wooden spoon school so just make sure you're arms are up to it.


Gradually add the eggs and a tablespoon of the flour mixture, then beat in the rest of the sugar, tha bananas and the vanilla essence. Best the remaining dry ingredients into the mixture adding the milk bit by bit.


Roughly chop the walnuts and fold into the mixture with the chocolate. Pour into the loaf tins and bake in the oven for 50 minutes or until a metal skewer comes out clean. Leave to cool in the tins for 10 minutes then turn out of the tins on to metal racks.


*I only have one small loaf tin so I split the batter into the loaf tin and into muffin trays. When you are using baking soda or power you can't really let the mixture sit for over an hour while one tin bakes. Take the muffins out (depending on size of muffins) after 20-25 or so mins.

Monday, May 9, 2011

London Food Festival


I recently went to a food festival in Earl's Court in London and it had to be one of the best days I have spent in a long time. It seems to me the only place where you can drink neat gin from 11 am onwards. I wouldn't recomend it on an empty stomach but from the moment you walk in, there are samples and cooking demonstrations galore.

A few things that I came away from the day were the above. I have already sung the praises of sloe gin and tasting the things that Sloe Motion did were so amazing. I will be making a much bigger batch this year. Edinburgh Gin may have just replaced Hendrick's as my favourite gin, it's not just whisky that the Scots do extraordinarily well. This gin is so rich in flavour and there isn't a burning throat in sight. If you can find some, get your hands on it. Conversely, their whisky is best left to their compatriots in the industry. Lastly: Love Your Larder is a way of getting all of these things which you can only get at farmers markets or foodie festivals straight to your door. Worth checking out as the guy on the stall was so lovely I only hope his fledgling business goes well.


I also went to an art fair that weekend. I'd say it was a rather good weekend.

Blue Mondays


I am not going to even begin to take credit for this. Lucy Young, protoge of the wonderful Mary Berry, is a great cook and recipe writer in her own right. Long established in the Aga community and beyond, she ensures all of her recipes cater to conventional ovens also; much to our benefit. This blueberry crumble cake is more of a blueberry-muffin-meets-shortbread than your standard cake. If you're anything like me, then you would think that is a good thing.

300g (10oz) self-raising flour
1 tsp baking powder (be sure to use just one measured tsp as if you use too much the cake will rise too much then cave in the center)
2 large eggs, beaten
Grated zest of 1 small lemon (if you are a thorough grater then you may only need half a lemon)
150g (5oz) unsalted butter, melted
200g (10oz) blueberries

For the crumble topping:
75g (3oz) self-raising flour
40g (1 1/2oz) unsalted butter, softened
75g (3oz) demerera sugar
25g (1oz) semolina (although this seems like very little, trust me it's worth adding)

You will need a deep, 20cm (8in) diameter spring form tin. Line the base with a disk of parchment and butter the sides well.

To make the cake, measure the flour, baking powder and caster sugar into a mixing bowl. Stir in the beaten eggs. Add the lemon zest and melted butter and beat again with a wooden spoon until combined. Although the recipe doesn't state it, I'm going to tell you: this is a very dry mix. It almost has the consistency of a very wet cookie or shortbread mixture so don't be alarmed if it doesn't resemble cake batter.

Spread two thirds of the mixture into the base of the tin (you may need to 'push' rather than 'spread') and scatter over the blueberries. Then spoon the rest of the mixture on top and try and leave a smooth, even surface. If there are the odd gaps, do not worry.

To make the crumble topping, mix together all the ingredients in a bowl and rub together with your fingertips to give a fine crumble mixture. Sprinkle this over the top of the cake (it will also serve to fill in any gaps that may be left showing the odd blueberry or two).

Bake in a preheated oven (160C /320 F for a fan oven) be sure not to have it too hot or the sides will go too crunchy and the center will stay gooey, too low and the whole cake will become rather hard. Bake for about 1 1/4 until golden brown and when the centre is tested with a skewer it comes out clean.

Remove from the tin and paper. Leave to cool slightly as the centre stays hot for some time, but try to serve warm. It is an amazing afternoon tea cake or post-lunch desert. I would serve it with pouring cream or cold vanilla custard.

Wednesday, April 27, 2011

Croque en Bouche


Courtesy of Bea's of Bloomsbury, which just so happens to be the best teahouse in London. That isn't hyperbole.


Now that the hubbub of the Royal Wedding has died down and they are no longer Kate and Wills but the Duke and Duchess we can reflect on the best part of a wedding - the food, and more precisely, the cake. I think most of the country would agree with William's
choice of chocolate biscuit cake but it seems to me that when it comes to wedding cakes, it's the French who have the right idea. Piles of profiteroles covered in crunchy caramel - winning wedding cake if you ask me. To give it full ceremonial status they must be towered into a large conical shape and decorated with various bits of nougatine, sugared almonds and royal icing, or anything you wish really.


In my first attempt at this 'cake' I had to assemble it in between courses for lunch so didn't quite brave the full stature that would have made it a Piece Montee. Filled with the holy grail of the pastry world (creme patissiere) and decorated with pastel coloured sugared almonds, this is a wedding - and general celebration cake - cake not to be missed! Be warned, those who do not have a sweet tooth, may be better off with Catherine's choice of wedding cake.


For the Choux Pastry:


Makes about 40 profiteroles
100g plain flour
Pinch Salt
150ml water
75g butter
3 eggs, beaten


Sift together the flour and salt into a large bowl. Place the water and butter in a large saucepan with high sides set over a medium-high heat, stirring, until the butter melts. Let the butter melt completely and come to a boil then remove from the heat. Add the flour and salt all in one go and beat very well with a medium spoon.


Reduce the heat and replace the saucepan, stirring for 1 minute until the mixture becomes sticky. Remove from the heat again. Pour about 1/4 of the beaten egg into the pan and beat very well. Add a little more egg and beat well again until the mixture comes back together. Continue to add the egg, beating vigorously all the time, until the mixture has softened, is shiny and had a dropping consistency. You may not need to add all the egg so keep an eye on it as you go.


Take two spoons and with a cup of cold water as well as two lined baking sheets. Wet the spoons and spoon the dough into walnut sized balls, giving enough space for expansion. Wet the spoons every time as the cold water will help create a crunchy shell. Place in a preheated oven at 220C (425F) and cook for about 20-25 minutes until puffed up and golden.


Take the profiteroles out and pierce a hole in the bottom of each profiterole, returning them to the baking sheets and placing them hole-side up. Return to the oven for another five minutes to allow the steam to escape. Allow the profiteroles to cool on a wire rack.


For the Creme Patissiere - make this when the profiteroles go in the oven so the cream if cold when it comes to filling the profiteroles:


7 medium free-range egg yolks
75g/3oz caster sugar
25g/1oz plain flour
4 tsp corn flour
500ml/18fl oz whole milk
1 tsp vanilla paste


In a large mixing bowl, whisk together the eggs and sugar until they turn a pale blonde colour. Whisk in the flour and cornflour and set aside.


Place the milk and vanilla paste in a heavy-bottomed saucepan, bring to a boil and simmer for about five minutes. Remove the pan from the heat and let cool for 30 seconds. Pour the hot milk onto the egg mixture, whisking all the time, then return the mixture to the pan. It is important to pour the hot milk onto the cold eggs before you return the mixture to the pan to prevent the eggs from scrambling. Bring the mixture back to the boil and simmer for one minute, whisking continuously, or until smooth. To check that it is the thickness you require, make sure that it coats the back of a cold spoon evenly. Pour the cream into a clean bowl and cover with cling film but ensure that the plastic is directly touching the cream. Place in the fridge to cool.


To assemble:
When the profiteroles are cool and the pastry cream is chilled, fill a piping bag fitted with a small piping nozzle. Pipe the pastry cream into the profiterole through the hole made by the skewer to release the steam. Make sure you don't over-fill or cause it to crack.


Make the caramel - place 375g caster sugar and 150ml of water in a saucepan, stir over a low heat until the sugar has dissolved. Do not stir after this point. Allow the sugar syrup to cook until it starts to develop a caramel colour. You can swirl the pan to even out the caramel colouring. It should be no darker than the colour of whisky when you remove it. Place the pan over a bowl of boiling water. Use tongs to dip the profiteroles into the caramel and assemble. This is when you can dip some sugared almonds as well to stick onto your Croque en Bouche, whether they are individual portions or large golden towers.

Monday, April 25, 2011

Elana's South Sea Chicken Salad

I normally cannot stand chicken salad, tuna salad, or anything of a wet salad nature. Elana's recipe for her curry chicken salad is the one exception. It is light, tangy, and a perfect lunch for those on a diet. You can also make it ahead and enjoy all week. Seriously yum...

Ingredients:
  • 3 cups cooked chicken breast, shredded
  • 2 mangoes, cubed
  • 1 cup chopped celery
  • 3 scallions, minced
  • 1 red onion, finely chopped
  • 1 head romaine lettuce, shredded
  • 1/4 cup cashews, roughly chopped
  • 1/4 cup minced fresh cilantro
  • 2 Tbsp lemon juice
  • 1 cup plain nonfat yogurt
  • 1/2 cup nonfat mayo
  • 1 Tbsp olive oil
  • 2 tsp curry powder
  • 1 tsp cumin
  • S & P
Directions:
  • In a small bowl mix together the yogurt, mayo, olive oil curry powder, cumin and s&p
  • In a big mixing bowl combine rest of ingredients.
  • Pour dressing over and stir.
  • Serve over salad or in sandwich form.

Thursday, April 14, 2011

Vietnamese Phở


Phở (pronounced "fa") is the first thing that comes to mind when talking about Vietnamese cuisine. For those who are unfamiliar, it is a hearty noodle soup normally with chicken or beef that has a load of delicious extras to pile on (think bean sprouts, mint leaves, lime, chili, etc).

We were in Ho Chi Minh City last week for work and got a good dose of all things Phở. There are the fast food chains carrying the soupy treat (notably Phở 24 and Phở 20) and the mom and pop shops serving it up out of a big cauldron. Now I know eating off the street is generally not advisable but if you happen to be in the area go visit the famous Phở Le sidewalk eatery for the best in town... just make sure not to look at the mass pile of questionable meat in the corner. Just take a couple of Pepto on the way in.. you will be fine. It's worth it!

For those who want to make this at home I have included a basic Vietnamese recipe for phở gà (with chicken). Of course, it always tastes best if you have a stock pot on the go but for those who live real lives just use the best stock you can get a hold of.

Phở Gà
serves 4

Ingredients:
  • 2 Litres of high quality chicken broth.
  • 1 inch knob of ginger, grated very finely
  • 1 Tbsp fish sauce
  • 2 cups shredded cooked chicken
  • 1 lb thin rice noodles, fresh or dried
  • 1 large yellow onion, chopped finely
  • 1 Tbsp rock sugar
  • 3 scallions, green part only, chopped
to garnish (optional):
  • beansprouts
  • mint leaves
  • fresh cilantro, chopped
  • lime wedges
  • fresh chopped chilis or chili paste to mix in.
Instructions:
  • Cook rice noodles according to instructions. Set aside.
  • Heat the broth, ginger, onions, fish sauce, and sugar over the stove.
  • Simmer away until onions are tender.. should be about 15 min.
  • Add the shredded chicken, scallions, and rice noodles and heat through.
  • Add salt if necessary.
  • Serve with whatever extras you like on top!

Tuesday, April 12, 2011

Books for Cooks

I'm fortunate enough to work in the publishing industry. It's a pretty small world, but luckily it is a gateway for so many other things. I don't think there are many people I've met whose great passion in life is books. What I've found is that people have other passions that are explored and accessed through books. Today I spent the day at the London Book Fair. Thanks to the nice folks at the Gourmand stand there is a cookbook corner. This is an area where there is a kitchen in front of a seating area where people (me) can sit in the front row and yell for more chillies in the Thai curry (I have a cold, such excesses are necessary when you can't even breathe). It is through publishing that I get to explore what I like in life.
I like cooking: I like reading about cooking. I like watching other people cook. I like browsing book shops for hours until I have found the next book that I would like to add to my already overwhelming collection. There are some which are astronomically priced and others which are small and beautiful. I would like to share with you my favourite books that I have, perhaps they can lead to further inspiration. As Raymond Blanc says - in a ridiculously strong French accent - "Cooking is about curiosity, and if I can inspire you to be curious, I will be a very happy man." Incidentally, he has a very good book out at the moment called Kitchen Secrets volume II...
So here are my favourite cookbooks that have helped me along the way:

1. Jamie's Italy is wonderful. I have never made something from this that wasn't delicious, my culinary failings have attempted to thwart the recipes but even a botched rice tart went down a treat as rice pudding. Not all of it is very easy, but it turns things like making soups and pizza from scratch exciting and altogether a whole lot more interesting. 2. The Pooh Cook Book. What can I say? The bear likes honey, I like honey, there is a lot to love in this one. 3. Pasta is something that I rarely go a week without in my house, hence carbs featuring heavily in my favourite book selection. This brings it back to basics and shows you how to make it all by hand. It's the kind of cooking we should be doing more but is currently practiced by a select few. 4. Fergus Henderson is a genius and pig's trotters are delicious - who knew! Well, probably Mr. Henderson, along with everyone that has worked for him or eaten at his restaurant or bar.


5. This book is the most underrated book on the market. Fact. Don't get me wrong, I'm a big fan of fruit and vegetables. If I had been given a book solely on this section of the food pyramid that was particularly splendid, it would be in my top five. This book made me love fish as well as teaching me that burgers are in fact a Russian invention (you need to go pretty far back though).

I have plenty of other wonderful tomes that people have been kind enough to give me, "I Know How to Cook" is an indispensable reference guide as well as a very pretty book to own. There are also several folders full of cuttings and recipe cards that I have collected over the years but a list has to start somewhere, so I started with the above.

If you want to get better at cooking then I suggest you start reading.

Saturday, April 9, 2011

Filo Parcels

These are so light and equally good hot or cold - making them a perfect take to work snack or lunch if you throw in some salad and vegetables of choice. I can happily eat them straight out of the oven with nothing else but a big smile. There is something about crispy filo pastry which is just so hard to beat. It is another low effort one, but you just need to be sure you don't man handle the pastry and it is very delicate.

1 packet of filo pastry
50g butter
Plain flour for dusting
200g spinach
250g ricotta cheese
50g pine nuts
2 tbsp finely chopped basil
1 tbsp finely chopped mint
small handful of finely grated parmesan
sea salt and pepper

Preheat the oven to 180C and add the pine nuts whilst it's heating up to toast lightly. Meanwhile steam the spinach for two minutes of so or until wilted. Remove from steamer and squeeze out water. In a large enough mixing bowl, add the spinach, ricotta, chopped herbs, parmesan, toasted pine nuts. Mix throughly to break up the spinach and evenly distribute everything. Taste before you season as the parmesan will provide a natural saltiness.

Melt the butter in a saucepan and turn off the heat. Lay your filo pastry sheets out on a floured surface and one by one (taking each sheet at a time) cut the sheet in half to provide the longest length possible. Brush the sheet with some melted butter and lay the other half on top of it. Take a large spoonful of the filling and put it in the top of the left hand side. Brush the rest of the pastry with some melted butter and fold over in right angles forming a triangle as you go along. Brush with a small amount of butter, a sprinkling of sea salt and place on a baking tray.

Repeat enough times as the filling will allow. Depending on how much you fill each parcel you should have 10 or so. Bake for 25 minutes and eat when you feel like it. Straight away is pretty rewarding though.

Sweet Chicken Pie

Roast chicken and sweet potato; who can argue with that combination? Now put them in a pie and make the top nice and fancy and you've just made that combination even better. I happen to use chicken thighs on the bone and roast them at the same time as the sweet potato, it means that the chicken stays more flavourful and that the potato soaks up anything that might escape from the chicken whilst cooking. If you have already roasted a chicken and you are looking for something to do with the leftovers then this is a good use of them too, it just means roasting the sweet potato separately. The puff pastry top gives a little bit of excitement as well as having a wonderful flavour. You can experiment with the nuts and herbs that go in the top (if using rosemary be sure not to go over board and make sure it is finely chopped). I have broken it down into three components: white sauce, filling and pastry, just to make the method clearer. Serve with some cabbage or tender stem broccoli.


White Sauce:

30 g butter

1 1/2 tbsp plain flour

375 ml whole milk

2 bay leaves


Add the bay leaves to the milk and heat through so it is just about simmering. Turn the heat off and let the bay steep into the milk. When the rest of the filling ingredients are ready, transfer the milk to a jug and remove the bay leaves. Melt the butter in a sauce pan, when it is bubbling add the flour and whisk vigorously until it forms a paste. Very slowly, and at first, bit by bit, add the milk whisking constantly until thickened, about 10 minutes. Add some salt and pepper for seasoning then pour over the chicken and potato in the pie dish.


Filling:

Four chicken thighs (bone in and skin on)

Four large sweet potatoes - peeled and diced into 1 in cubes


Preheat the oven to 180C. Prep your potato whilst you're waiting and scatter them into the bottom of a baking dish. Season the chicken thighs well, on the top as well as the bottom and snuggle them in with the potato. Roast everything for 40-45 minutes (cooking times will vary depending on the size of your chicken thighs as well as your oven). After 20 minutes give everything a stir to keep things browning evenly. When you take it out, let the chicken sit for about 5 or 6 minutes. When ready to use, take the skin off and remove the bone. Shred into bite sized pieces and put in a pie dish along with the potato.


Pastry:

Half a packet of puff pastry

2 tbsp fresh thyme, picked from woody stalks or finely chopped if soft stemmed

50 g toasted hazelnuts, chopped

1 medium egg, whisked


Roll the pastry out so it is very thin. Roll it out so it is double the width of the pie dish you are using. Scatter the chopped hazelnuts and the thyme on half of the pastry. Brush the egg wash in a square around the nuts and herbs and fold the pastry over on itself. Press down on the edges to make sure they are sealed, I also pass a rolling pin back and forth to make sure it is thoroughly compressed. This may lead to a few holes so try and be careful to keep these to a minimum (size wise at least). Once you have all of the filling in the pie dish, brush more of the egg wash around the rim and press the pastry lid on top, you may need to gather any excess pastry bunched on the side. Take the rest of the egg and brush over the top of the pastry to give it a lovely crisp as well as a beautiful sheen. This needs to bake for 25-30 minutes.


Sunday, April 3, 2011

Classic Boeuf Bourguignon with Crispy Potatoes

The couple Elana and I are staying with/torturing requested boeuf bourguignon as their Sunday supper, claiming it is their favorite dish of all time. When people say "favorite" I instantly get heart palpitations as this means they had this orgasmic bourguignon experience while visiting the French countryside with their first love and their life has never been the same since. Oh mon Dieu! It is; however, unlike me to step down from a challenge and I stepped into kitchen (which do not normally include air conditioning in Singapore) and cooked this baby for 3 delicious hours.

I have to say my final product turned out lovely. They were highly complimentary and, whether true or not, this makes me feel instantly better. How many years did I spend learning the language of love? Eleven. Do I still sound like redneck? Yes. This, I have accepted, will never change but my culinary skills redeem my horrible linguistic slaughter. N'est-ce pas?

BOEUF BOURGUIGNON with Crispy Potatoes
serves 4

Ingredients:
  • 3 large potatoes ( i used maris piper but you can use whatever you like)
  • 25 small pearl onions, peeled
  • 10 slice large button mushrooms
  • 4 cloves of garlic, roughly chopped
  • 1 large sprig of fresh thyme, dried is fine too
  • 2 bay leaves
  • 1 bottle cheap red wine
  • 2 cups beef stock
  • lots of extra virgin olive oil
  • 1 pat of butter
  • salt and pepper
Directions:
  • Roll the beef in seasoned flour
  • Brown beef on all sides in oil (with a little butter). Make sure they are good and brown so the meat doesn't lose its moisture during cooking. When done, remove from heat.
  • In the same pan, cook pearl onions until they have a light brown exterior. Remove from heat.
  • Repeat with mushrooms. This should not take very long at all (we don't want them to go mushy).
  • Add meat back into the pan.
  • Add the bottle of wine, chicken stock, garlic, thyme, bay leaves to the meat.
  • Simmer on a VERY low heat for at least 1.5 hours
  • When you are nearly ready to serve, toss in the onions and mushrooms and cook for 25 more minutes. You are done!
for the potatoes:
  • While the stew is bubbling away, set your oven to 425F/220C and make your potatoes.
  • peel and slice the potatoes VERY thin. You can use a mandolin if you have one.
  • Par boil your slices in a pot over the stove for about 5 minutes so they are a bit softer.
  • Drain and let them dry a little bit
  • Arrange on a sheet so they overlap and sprinkle with olive oil.
  • Bake until brown and crunchy.. sprinkle with rock salt.

Thursday, March 31, 2011

Sausages Part Two: Sausage and Mash Anew

This is like a big hug on a plate. It's so straightforward to do, and pretty much does all the work for you. Though it is such a simple dish, there are some good strong flavours to help lift it out of the mundane. You can really use any veg mash you like but as celeriac is my favourite and carrot compliments the sweetness in the sauce, and it's good to have an earthier vegetable like swede to balance it out. I've taken a picture of some of the ingredients because photographing cooked sausages is no easy feat. I challenge all photographers to make this and then create an appetising picture. It is feasible, but I had a hot dinner to worry about. Well, here you go:

Serves 4

A pack of sausages (I like Cumberland for this one)
2 tbsp of wholegrain mustard
1 tbsp of Dijon mustard
3 tbsp runny honey
One celeriac (small)
5 small-medium carrots
One swede (small)
2 tbsp of fresh thyme, picked from the woody stalk
Large knob of salted butter (if mash seems very dry, then add more I say)

Preheat the oven to 190C.
Chop up the veg into inch cubes so they don't take forever to cook. Cook in salted boiling water for about 20 minutes - check that they are tender before emptying the water. When you put the veg into the water put the sausages into the oven. Cook the sausages for twenty minutes and make sure you have your honey, and mustards mixed together. When the sausages are nicely browned pour the honey mustard mixture over the sausages, coat evenly and return to the oven for a further five minutes. In the last few minutes of the sausages cooking, drain the veg, add the butter and thyme and let it steam for a minute or two. Get your masher out and work quickly to combine the veg.

Give a generous scoop to each person and top with two sausages per person.


Sausages Part One: Toad in the Hole

This is something that is quintessentially British. And goodness knows why it remains so because it is such a delicious speciment that I struggle greatly without it. It's amazing becuase you can increase the ratio to serve several at a dinner party of you can scale it down for two to have as a mega treat. This goes with some wonderful standards like honey glazed parnsips, tyhme roasted carrots, cabbage and best of all, onion sauce/chutney/gravy/reduction. This is mostly Yorkshire Pudding, accented with some succulent sausages (becuase sausages always have to be succulent don't they). You can try and make this fancy, but as someone who is half Yorkshire I can tell you there aren't too many fancy things that come out of this part of the land - apart from maybe Taylors of Harrogate and Bettys Cafe Tea Room - but the exports they have been kind enough to bestow on the rest of us are incredible. Rhubarb. There's another one.
Anyway, on with the show:

I work on a ratio of two sausages per person, however, you know what to do if you have a hungry crowd. To make the above you will need:

1/4 pint milk
60g plain flour
pinch of salt
two eggs

sausages
sprigs of fresh rosemary
duck/goose fat

The size and shape of your tin will affect the batter greatly, if you have a large loaf tin then great (I don't, can I have yours?) otherwise find something that everything will fit into, that is narrow but not confining.

Preheat the oven on its highest setting. Mix all the batter ingredients in a large mixing bowl. Start with the flour and salt, beat the eggs into it one by one then pour the milk in slowly and gradually, continually whisking to avoid lumps. Set to one side to let it rest.

You will need about two table spoons of the fat in your baking dish. Put it in the tin to heat up in a pre-heated oven. When the fat is at full heat add your sausages to colour slightly. When they are no longer looking anemic (very carefully) take the tin out of the oven and pour your batter over the sausages and scatter the rosemary springs about. Put back in the oven and do not open it for at least 20 minutes. The Yorkshires will need the heat to help them rise and should be cooked at this point. If it's looking a little brown then turn the over down and keep them cooking.

This is truly a dish that gets better every time you make it, so get started and watch them become better and better each time you make it.

Wednesday, March 16, 2011

Skinny Dipper: Papaya and Pineapple Salsa

Health Alert: Elana and I attempted to swim laps yesterday and virtually sunk to the bottom. At the tender age of 24 this should not be happening. The problem is that we diverted so far off the healthy eating path by the way of fried Asian delicacies. Today this ends. We are attempting to bring healthy eating back into our lives and become those slender tan ex-pats we know we can be. Hooray!

I do have a plan of action. It comes in the form of fruit.. yum! The variety and affordability of fruit here blows my mind. It is dirt cheap and actually tastes like it is supposed to (not like the sour unripe mess we eat at home). One thing I have been missing is Mexican food: chips, dips... you know the drill. I thought an exotic salsa would fill the void and give me something healthy to lather on my celery sticks and boiled chicken. Make Will Noel's skinny guacamole (see side bar) and you have yourself a real fiesta. Never thought Mexican night would become my healthy one.. Arrriiiibbbaaaaaaaaaa

Papaya and Pineapple Salsa

Ingredients:
  • 1/4 cup chopped cilantro (coriander)
  • 1 cup small cubed papaya
  • 1 small jalapeno, deseeded and chopped
  • 1/4 chopped onion
  • 2 Tbsp lime juice.. I used the little Thai limes. Aren't they cute?
  • 1/2 cup small chopped avocado
  • 1/2 cup small chopped pineapple
Directions:
  • Mix all together, cover, and refrigerate for an hour
  • Serve on chips, veggies, chicken, or fish.
  • Watch yourself become thin before your very eyes.
  • Once thin, engage in saucy behavior.

You say tomato, I say tomato


What we have here is a roasted tray of delishiousness that once it meets a blender will give you a great soup that can give you some vitamin C whilst the clouds remain gray. For this you will need the following:
500g cherry tomatoes (kept whole)
2 large red peppers (roughly chopped up)
Large red onion (in quarters)
4 cloves of garlic (bruised and kept in the case)
4 tbsp balsamic vinegar
2 tbsp water
Half a tin of chopped tomatoes
400ml vegetable stock
Two tbsp of freshly chopped green herbs (I used flat leaf parsley and tarragon but basil etc would be perfect)
Salt and pepper

Put all of the vegetables in an ovenproof dish with the balsamic vinegar and water and season. Cook for about forty five minutes. Stir them every so often so they don't burn, browning is great, but we don't want anything too charred.

When the veg comes out of the oven add the stock, tinned tomatoes and fresh herbs and blitz in a blender.
It will be pretty thick so if you want you can add more stock. Put everything into a saucepan and cook it through so it is hot enough to serve.

Thursday, March 10, 2011

How To...Courtesy of Mich Turner, founder of Little Venice Cake Company


I for one am an advocate of self-teaching. I think there is nothing that we are not capable of, if only we try. This ethos may have led to a small kitchen fire and a collapsed cake or two, but I now know what to do by learning what NOT to do. However, if someone comes along offering you help and instruction, just because they want to share their knowledge, you should whole-heartedly accept.


Mich Turner is the founder of Little Venice Cake Company in Marylebone, London and her clientele list alone will show you that you she knows a thing or two about making cakes. Have a look at what she has done so far at: http://www.lvcc.co.uk/


And here she is letting you in on a few trade secrets from her new book Mich Turner's Cake Masterclass. First up we have sugar paste rose:
www.youtube.com/watch?v=8fczCtymCSc

Secondly, is Mich's perfect fruitcake. The ultimate base to a great celebration cake, worlds away from those dry things you were tricked into eating as a child at relatives' weddings and anniversaries:

www.youtube.com/watch?v=2O6WZy1hLR8


Sorry it's not the originals, the videos I had were way too big.


Saturday, March 5, 2011

Now a Singaporean!


I have arrived in Singapore in one piece with one piece of luggage. As there are no clothes on this island that will fit me (think Shrek trying on baby clothes), I will spend my time embracing my size and eating my way through the zillions of Chinese, Malay, Vietnamese, Thai, Indian, and Western options until I am large enough to float home. Let the games begin!

Goal: Explore every tasty treat this island has to offer and learn the basics of Asian cooking! I am no expert!
Target Consumption: I will attempt to try something I have never had at least once a day... ok.. once every other day. I attempted frog congee (Chinese frog porridge)... didn't get too far I'm afraid before my love for Kermit intervened. Shame. I shall; however, forge on...


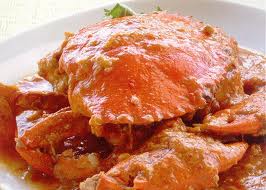
The first night we got here our hosts took us out to enjoy the traditional dish of Singapore, Chili Crab. These crabs are HUGE; they make our Chesapeake variety look like midgets. This spicy stew is absolutely divine and is to be enjoyed with steamed rolls (which you use to soak up the sauce). I am attempting to make this dish myself this weekend and from a traditional Malaysian web-site. Looks easy, will report back!

SINGAPORE CHILI CRAB!

Ingredients
  • 1 Dungeness Crab (about 2 lb size) OR 3 little crabs of any variety
  • 1 sprig of cilantro for garnish.
  • 1 Tbsp sugar
  • 2 Tbsp tamarind juice (try Asian markets)
  • Salt to taste
  • 2 Tbsp peanut oil
  • 1/4 cup of water.
for the spice paste:
  • 8 dried red chilies (soaked in hot water and deseeded)
  • 3 cloves of garlic
  • 1 inch of fresh ginger
  • Tamarind juice.. until the thickness is acheived.
DIRECTIONS:
  • Clean the crab and chop it into pieces. Save the green and juicy stuff inside the shell and set aside.
  • Pound the spice paste with a mortar and pestle or grind them using a food processor.
  • Heat up your wok and add cooking oil.
  • Stir fry the spice paste until fragant and spicy.
  • Add the crab and 1/4 cup of water and do a quick stir. Cover the wok with its cover for 3 minutes.
  • Add the green and juicy stuff from the shell and stir well.
  • Add in sugar, tamarind juice, a little salt to taste and continue stirring for about 2 minutes or until all crab pieces turned red.
Serve with Chinese Steamed Rolls. They are a pain to make so you can buy them in Asian markets.. if not, just serve with rice.

Tuesday, February 22, 2011

Caramel Slice


If Belinda Carlisle sang a song about baked goods this would be the goods. Otherwise known as a Millionaire's Shortbread this is heaven. I'm calling it a caramel slice because this is more about the caramel than the shortbread. It features as prominently as the shortbread does and it's lightly salted flavour makes it a bit different to your usual Millionaire's Shortbread, but different is good. If I want to show someone I like them I will make this for them as it isn't the quickest to make. The components in themselves take little effort to make but having the patience to assemble everything is the real work. I actually found the recipe for the caramel and the shortbread separately in a book called Fat: An Appreciation of a Misunderstood Ingredient, with Recipes by Jennifer McLagan. Published in the US and the UK so I'm not being biased. Each part broken down here:


Shortbread

1 cup/8 ounces/225 g cold unsalted butter, dices, plus extra tsp softened for greasing

1/2 cup / 3 1/2 ounces /100 g caster sugar

2 cups / 8 1/2 ounces / 250 g flour

Pinch of fine sea salt
1/4 tsp fleur de sel (if making a sweetshortbread on its own then you can sprinkle with demerara sugar instead)


Line a 25 cm x 15 cm (ish!) tray with greaseproof paper making sure that it comes all the way to the top of the tin and use the extra teaspoon of butter to lightly butter the tin.

Combine the cold butter and sugar in a bowl and if you have a mixer, using a paddle attachment, mix on low speed for 15 seconds. If all you have is elbow grease (like me) they mix the two together until combined. Add both the flours and a pinch of salt and mic again until the dough comes together (if using the machine this will take about 3 to 5 minutes on low speed).

Form the dough into a ball and, on a floured surface, roll in out about 1 cm thick rectangle. Gently place the dough into the tin and pat it out until lit even fills the tin. Using a fork, prick the dough all over, right through to the tin.

Refrigerate the dough for 1 hour and preheat the oven to 150 C/300 F.
Take the dough from the fridge, and sprinkle with the fleur de sel and place the tin on a baking sheet. Bake until the shortbread is just firm in the center and beginning to colour, about 40 minutes. Take it out of the oven and let it cool in the tin. Please note that the shortbread is wonderful on it's own if that's as far as you care to go this time around.


On to the caramel...

Salted Caramel

1 1/4 cups / 9 ounces / 250 g caster sugar

1/2 cup / 4 ounces / 115 g salted butter, diced

1 cup / 250 ml whipping cream

Pinch of salt

Combine the butter and sugar in a deep, heavy saucepan over medium heat. It is easier if you use a silver based pan as that way you can see the caramel turning colour, this is not so easy with a black non-stick pan. Stir to mix and cook, stirring occasionally, until the butter and sugar caramelize, 10 to 15 minutes. The sugar and butter will go through several stages. First it will look like a flour and butter roux, then it will appear curdled and then the butter will leak out of the sugar mixture. Don't worry: it will all come together in the end!

While the caramel is cooking, pour the cream into a saucepan and bring to the boil over a medium heat. Remove from the heat and set aside.

Keep stirring the butter and sugar mixture, watching carefully as it begins to caramelise and remembering that the heat in the pan will continue to cook the caramel once it is removed from the burner. You want a rich, dark caramel colour, but you don't want to burn the mixture. When the caramel reaches the right colour, remove the pan from the heat and slowly and carefully pour in the cream; the mixture will bubble and spit. When the caramel stops bubbling, return it to low heat and cook for 5 minutes, stirring to dissolve the caramel in the cream. Remove the pan from the heat and let the caramel cool in the pan. It may be wise to leave this overnight, if you have the time. Alternatively, let it cool for about 45 minutes then poor it directly onto the shortbread and leave it to set overnight.

When the caramel is set (be warned, it will always be slightly runny rather then a stiff fudge-like consistency you often get with a millionaire's shortbread) you can finish it off with the chocolate topping:

Melt 200g of the finest milk chocolate you can get your hands on - or if you prefer it slightly richer you can up the cocoa - in a bain marie and smother over the caramel. Leave this to set until the chocolate is hard and then here comes the only hard bit of this:

To cut the chocolate squares take a bowl of boiling water and a sharp knife. Gently cut straight lines in a sawing motion rather than just applying pressure as this will cause the chocolate to crack in uneven shards and wont look as pretty. Continue in the same method - you will need to dip you knife in the boiling water from time to time to help it through the chocolate.

Once they are cut into squares lift them out all together using the greaseproof paper as a handle and share with friends. They will like you for it.


Thursday, February 10, 2011

Fish Pie


As I become more and more fed up of these winter months the more and more I've turned to comfort food. Great for my tummy, not so great for my scales. After a foray into the world of mac and cheese I thought it best to reign it in a little and move towards the healthier realm of comfort food. This pie is like a warm duvet washed in lenor's new fragrance of fish pie. You can vary what goes on in these a lot but I like to have some kind of shell fish, some kind of white fish and some kind of greenery. The sauce and topping I think you should stick with as it really does work. As the topping is crumbs you can serve with carbs but I would recommend some leeks as they go really well with the vermouth, some carrots would also look pretty here.

Ingredients:
600 g haddock cut into 3x3 inch segments (I use un-smoked, un-dyed)
250g cooked and peeled prawns
375ml skimmed milk
1 1/2 tbsp plain flour
2 tbsp unsalted butter (plus extra for cooking crumbs in)
1 bay leaf
2 cloves of garlic, mashed
2 tbsp vermouth
3 pieces of bread blitzed into breadcrumbs
1 lemon - finely grated rind only
2 tbsp chopped flat leaf parsley
large handful of grated Parmesan
Bag of spinach, washed
seasoning

Firstly make your white sauce:
Heat the milk with the bay leaf in a sauce pan until it simmers then turn off the heat and leave to infuse.
Heat the two tablespoons of butter in a thick based saucepan. When it is bubbling whisk in the flour as well as 1/2 tsp salt and 1/2 tsp of black pepper until it forms a paste. Very slowly whisk in the hot milk lowering the heat to medium. Whisk constantly while the sauce thickens for about 15 minutes. Stir in the vermouth, let it cook for a few more minutes then turn off the heat. Remove the bay leaf when you add the white sauce to the pie dish.

Secondly, make your fish:
In a cold pan add the butter and garlic, allow the two to melt together. Once the butter is foaming add the portions of fish and season. Give them about 2 minutes on each side to colour and absorb the garlic. If you do have any of the lemon left over from grating the rind a little squeeze here wouldn't go amiss but not essential.

Thirdly, assemble:
Line a deep pie dish with as much spinach as you can fit in and press down to leave room on top for the fish. Place your fish on top, it should break up into 1 inch segments when you take it from the pan and scatter over spinach. Scatter over the prawns and then add the white sauce making sure everything is covered. Scatter the pie the Parmesan.

Then make your crumb topping:
Wipe the frying pan in which you cooked the fish. Heat some more butter in the pan and once it is bubbling add the bread crumbs and lightly toast. When they are turning golden season well add the parsley and lemon and stir through then take off the heat. Scatter directly over the pie for a thick crispy topping.

Cook in a pre-heated oven at 180C for about 25 minutes. Whilst it is in the oven you can steam/saute/boil your veg of choice. Serve together and enjoy!